• Skip to main content
  • Skip to secondary navigation
  • Skip to primary sidebar
  • Skip to footer

Comics for Beginners

How to Write & Draw Comics

  • Contact
  • About
  • Faqs
  • Log In
  • Resources
  • Podcasts
  • Comics Crash Course
  • Blog
  • Videos

making comics

How to Choose the Right Drawing Table

by Palle Schmidt 12 Comments

Photo 26-09-13 13.13.36If you are serious about your craft, having a workspace dedicated to your art is essential. Even if you’ve gone digital, you need somewhere to put your Cintiq and be comfortable, since you’re going to be stuck at that desk for a looong time. I’ve been through a bunch of tables myself and still haven’t found the PERFECT one. But I’m fine with what I have and ultimately it’s not the tools but what you do with them that matters. That said, you need something that does the job!

Here are a few things to consider when shopping for an art table:

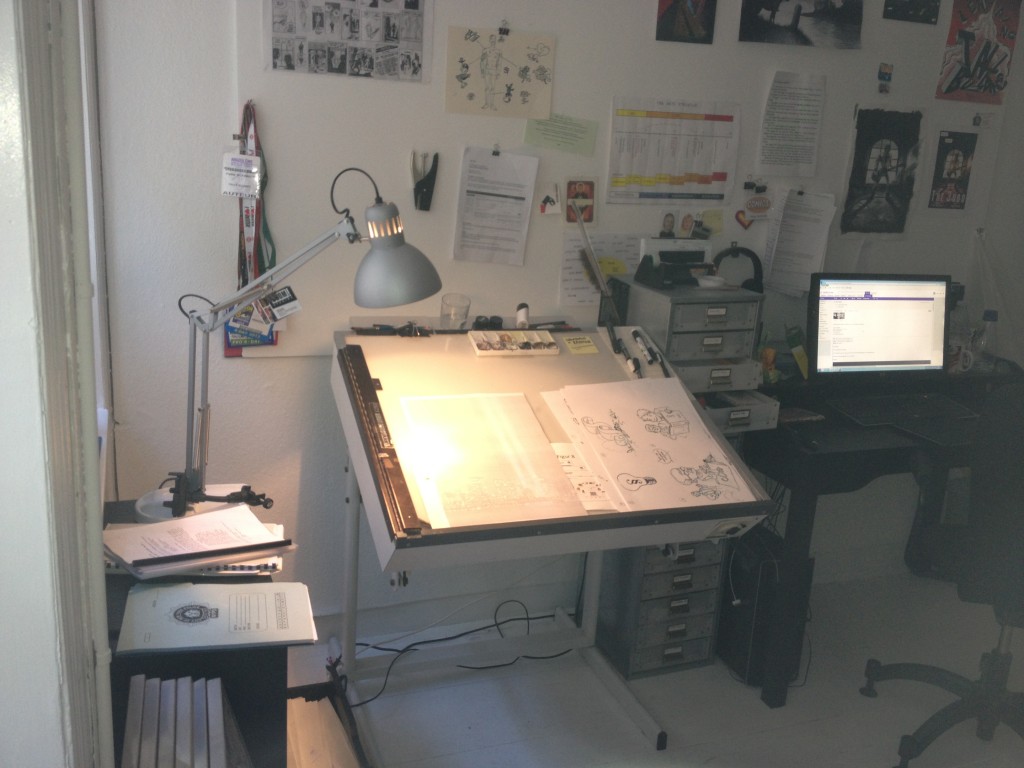
  • You need a table that can be slanted, so you don’t have to crouch forward too much. A slanted table helps prevent back/neck trouble down the line.
  • Your table should be slanted just enough so you pencils roll off whenever you’re not looking. I’m KIDDING! How much/how little is all about what you’re comfortable with. Some people like standing up at their work table, others like to be on the couch. You decide. Whatever feels comfortable enough.
  • It should be possible to adjust the angle/how slanted the table is. Because you might find a 5 degree angle makes all the difference.
  • Besides the angled table, you will want to have either a part of the table with a regular, horizontal surface, or another table besides it to put your stuff. If you don’t have a “lay-away” table, your mess will go on the floor and you’ll have no place for your coffee cup. Which is a violation of work laws everywhere!
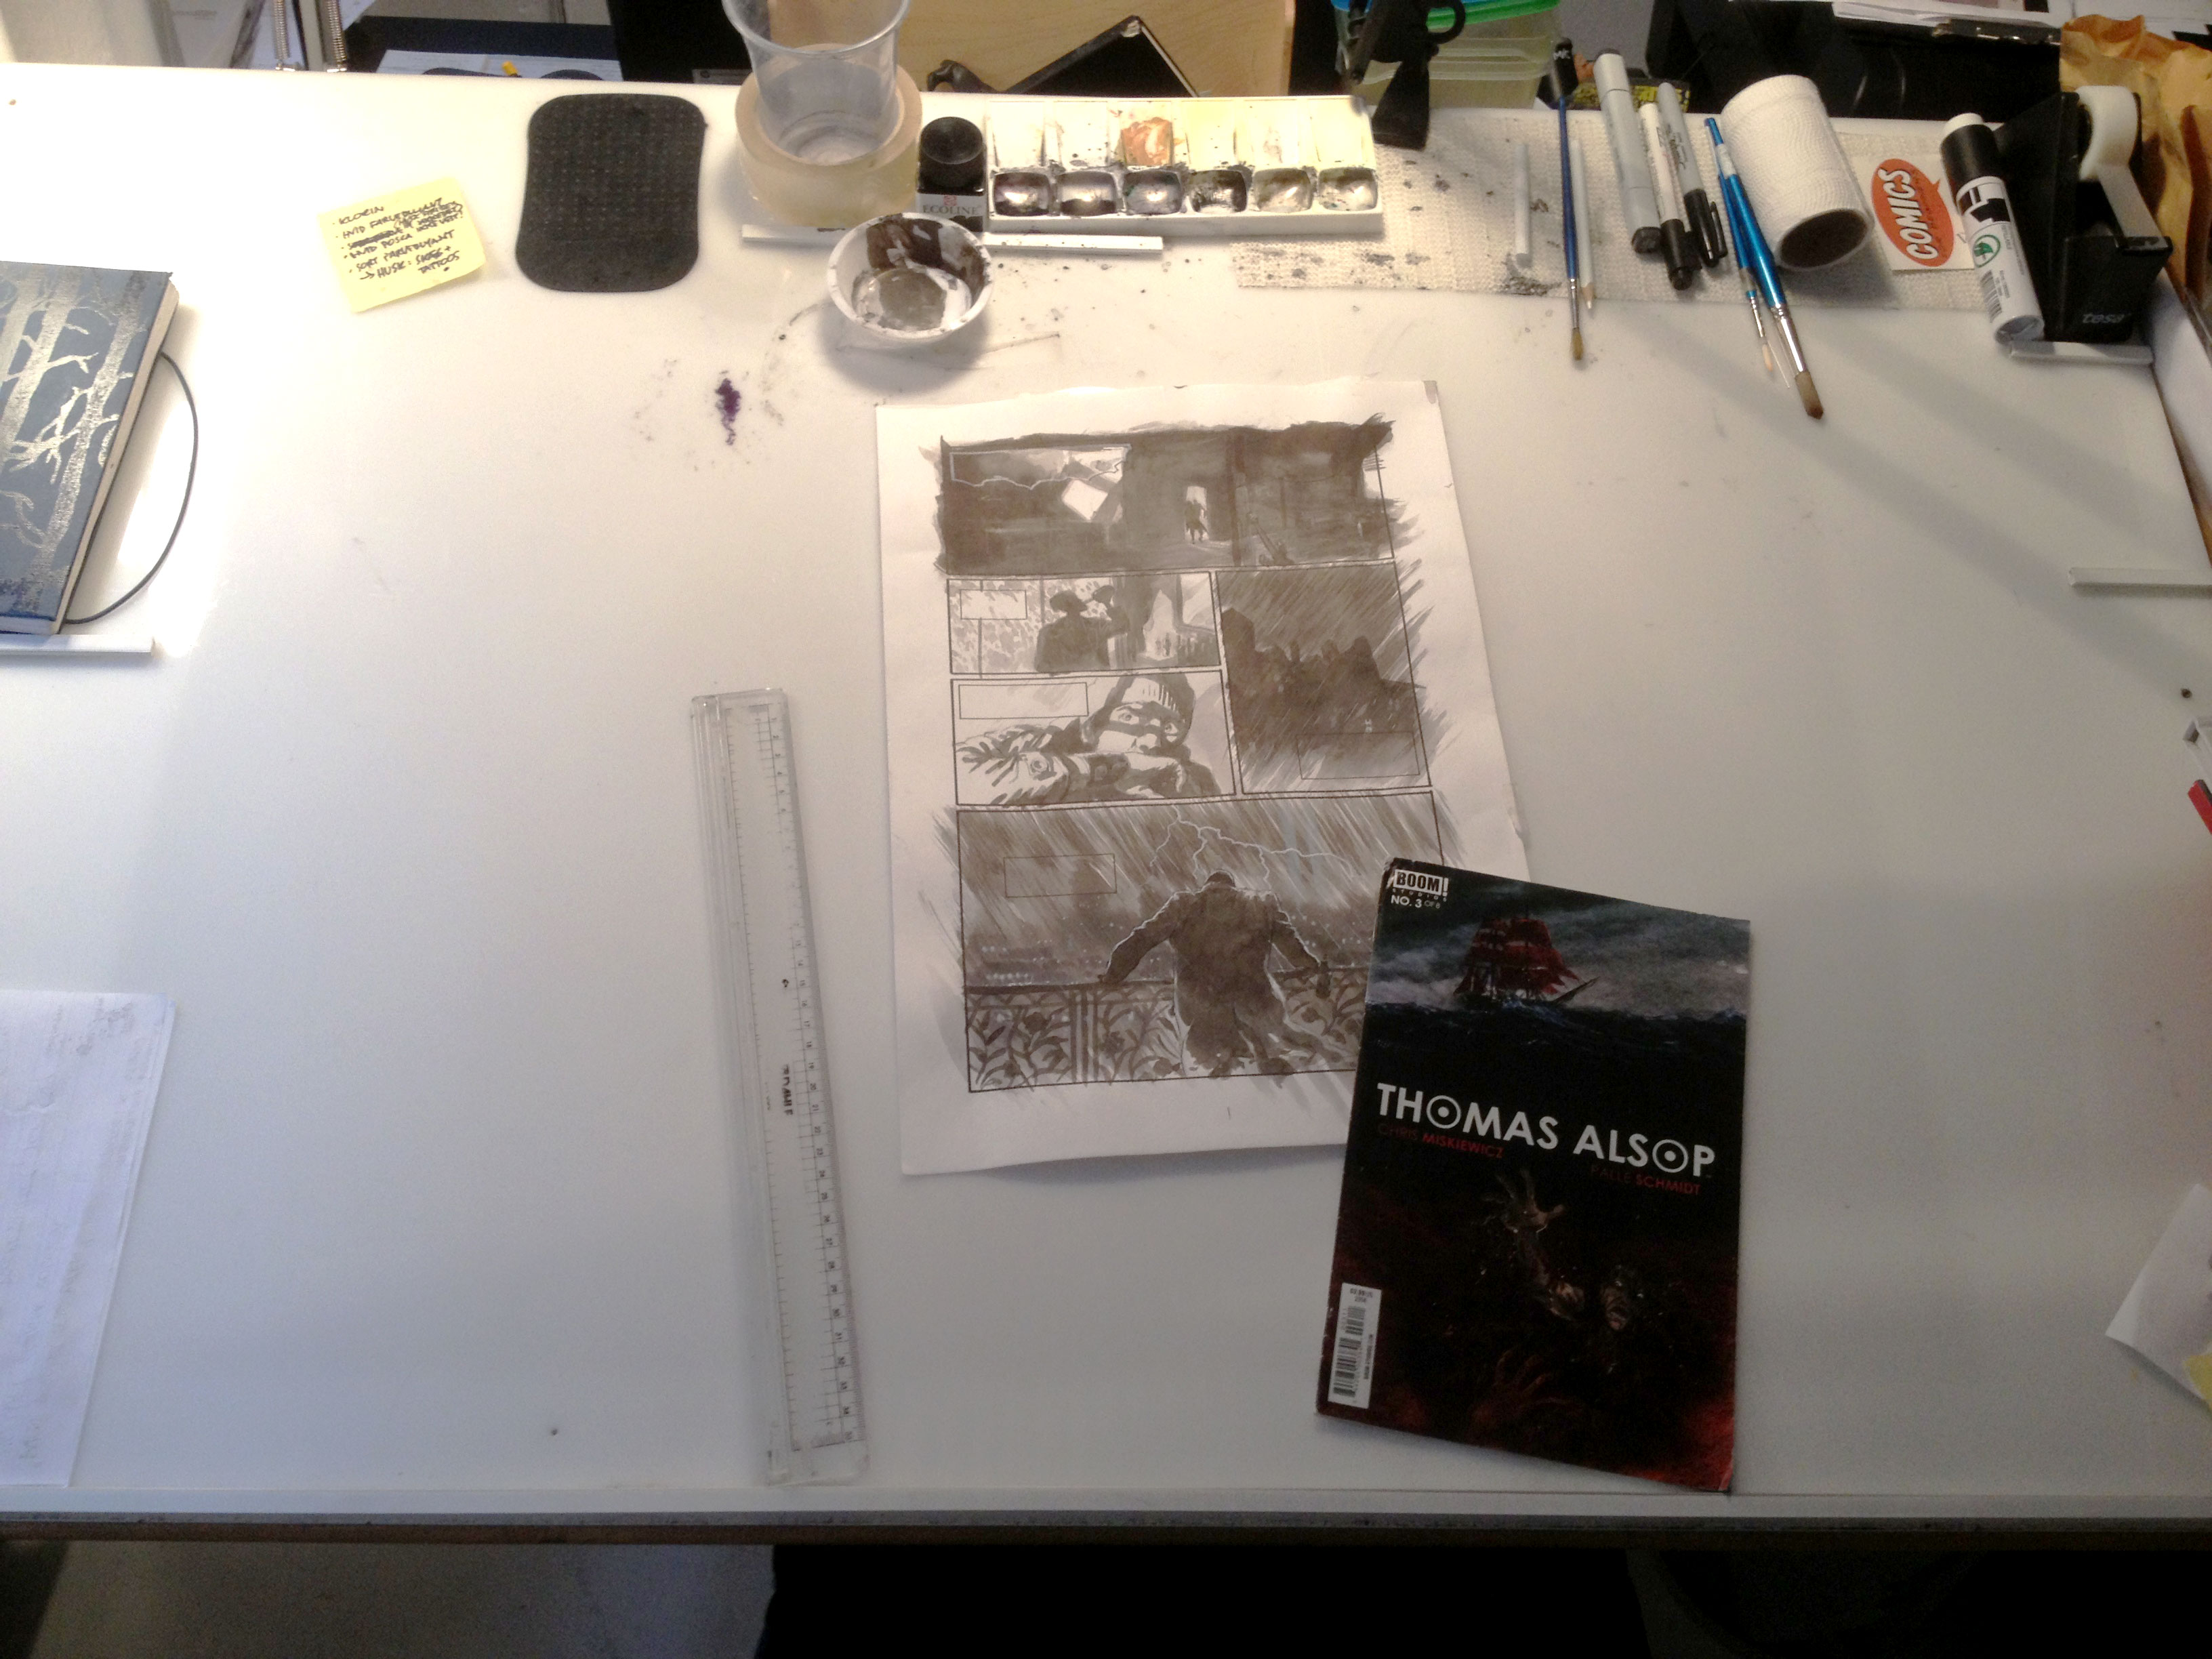
  • There are a number of hacks to prevent stuff from falling off your desk. Rubber matting/shelf liner is by far the easiest and least intrusive. If you have an old table you don’t care much about destroying, a few screws or nails in the top might be helpful (bonus tip: a binder clip on a nail can hold almost anything, from your reference books to your art). Or glue a pen holder on it. Only after months of working at your table, will you discover your own habits and needs.
  • You need a tape roll of not-too-adhesive tape for taping your artwork while working on it! Use Scotch tape or masking tape, anything you can easily remove again, without destroying your art or leaving sticky leftovers on your drawing board.
  • Anything under the table? If you’re going to spend long hours at your drawing board, you don’t want to constantly be banging your knees against a metal rod or whatever. Check underneath for possible annoyances before buying.
  • If you’re on a budget, consider just putting a wooden board big enough to fit your drawings (and then some) on a big “regular” table. A sturdy box underneath and a few screws to prevent the board from slipping and you’re off!  Or get something used, at least for starting out. Buying a $300 crafts table might sound great for your art prowess, but are you really just putting off working, imagining this will make you a better artist?
  • Obviously you also need to consider the space the table will go in. Too big or too small? Only you will know as it’s going in your work space.
  • Use a lightbox often? Consider getting a table where that is built in. I found that having to go to another table to adjust a drawing was annoying, so now I’m back to drawing on a big glass light table again.
  • Please note that the chair is almost as important as the table. I have a chair without wheels, because I tend to lean in quite a bit, causing the chair to slowly slide back if not completely steadfast. Which again cause me to subconsciously tighten my lower back muscles = pain!
  • You need work light that doesn’t hurt your eyes (anything but flourescent light!) and makes it easy for you to see your art. Be sure to place the desk lamp so your hand doesn’t block the light as you’re drawing. Right handed = lamp to the left, left handed = lamp to the right.

I always recommend people to use whatever tools fit their needs, not what other’s do, so please take all this advice with a grain of salt. I do hope you got some value from it.

What kind of art table do you have? Please share! I’d love to hear what’s working out for you.

If you want to know the tools I use, go to this page and watch the video about halfway down.


Sign up for my FREE  7-day Comics Crash Course

Filed Under: News, Pro Tips Tagged With: art, art hacks, art table, binder clip, budget, cintiq, crafts table, creativity, desk, learning, lightbox, making comics, productivity, Scotch tape, shelf liner, studio, tips for art tables, work space, workflow, working methods

ProFile: Jason Brubaker

by Palle Schmidt Leave a Comment

ProFile-Jason-BrubakerJason Brubaker began his career in graphic novels in 2011 with the Xeric Award winning reMIND which also got on the Great Graphic Novels for Teens list 2012. In 2014 he quit his full-time job as a Visual Development artist at Dreamworks Animation to pursue publishing his own comics. You can support Jason’s work here: patreon.com/jasonbrubaker

What made you decide to work in the medium of comics?

I grew up loving comics and always wanted to draw sequential art. But when I started working as a professional artist I put aside comics because I thought they were for kids. 10 years later I was convinced to give comics a try again and I’m glad I did because now I realize how powerful and effective they are at telling stories and getting a message across. I love comics because they are the perfect medium for solo artist/writers to tell their stories.

What part of the process is the most challenging or frustrating to you?

I think the most challenging part is the marketing part, or social media part. These are just so unnatural for me as an artist and sometimes I just want to ignore it all and just work on the books but at the end of the day I need to put my stuff out there in a social way to that others can see it and respond to it.

If you could give one piece of advice to an aspiring comics creator, what would that be?

Make sure you really believe in what you are trying to say in your story. It takes a lot of commitment to get a full comic story finished and if you don’t believe your own message then it’s going to be near impossible to put in all the work to finish it and it will also be hard to put your best work into it too.

Filed Under: Pro Tips, ProFile Tagged With: drawing, Dreamworks Animation, making comics, pro tips, reMIND, sequential art, social media, storytelling, writing for comics, Xeric Award

Art tutorial: Tips for digitally coloring comics

by Palle Schmidt Leave a Comment

coloring-in-psd

Coloring digitally in Photoshop or Manga Studio can save you some time and grief, and it is pretty easy to learn. Here are a few pro tips to make it even easier!

  • Start with the background color and the general flow of the page and save the best for last: coloring your characters.
  • Make a seperate layer for your characters and foreground objects, and flat them out first. This saves you time when coloring, because you can select the entire shape and not be afraid to paint outside the lines.
  • If you are coloring for print, please note that your screen is backlit, which means it looks a lot brighter there than it will on paper! Beware of colors that are too dark.
  • Convert the image to grayscale, to see if the color works. I know this sounds weird, but thinking of coloring in shades of grey can really help. It’s all about light and dark, and everything in between. By converting to grayscale, you will instantly spot where if it is all the same value, too dark or too muddled. You can always undo the conversion and get all your colors back!
  • Always put your line art on top, so you paint under the line art. Set the line art layer mode to multiply, that should work perfectly.
  • Colors should not compete with line art. Try not to have colors that are too dark. 80% black is probably too close to the black of the line art.
  • Use a seperate layer for the background color and another on top for people and objects etc. Experiment with the opacity of your regular color layer, to let the background color shine through.
  • Having a seperate layer for speech balloons and borders placed at the top of your color layers is also a good idea, as it prevents the risk of painting over your borders or into the whites of the balloons.

Related video:
Episode 8: Coloring in Photoshop

Filed Under: Art Tutorial, Pro Tips Tagged With: coloring, digital, digital painting, how to, making comics, painting, Photoshop, tips for making comics

ProFile: Jeremy Haun

by Palle Schmidt Leave a Comment

ProFile-Scott-Jeremy-HaunJeremy Haun is the current artist on Constantine. Wolf Moon, by Jeremy and Cullen Bunn, debuted in December from DC. He recently completed a run on Batwoman. Over the past decade plus, along
with wearing calluses on his fingers doing work for DC, Marvel, Image, and others, he has created and written several projects. Some you might know are graphic novel Narcoleptic Sunday, Leading Man, and The Beauty, soon to be out from Image. He is a part of the Bad Karma Creative group, whose Bad Karma Volume One debuted at NYCC 2013, thanks to Kickstarter funding. Jeremy resides in a crumbling mansion in Joplin, Missouri with his wife and two superheroes-in-training.

What made you decide to work in the medium of comics?

I’ve always been a huge comics fan.   I spent my childhood drawing and redrawing what I saw in comics and telling my versions of those stories.  It’s what I always wanted to do.

What part of the process is the most challenging or frustrating to you?

Doing the comics themselves is challenging, but probably the most consistently frustrating part is managing the time required to make comics.  While comics are perceived as a fun child-like medium, the time you are allotted to create a comic is about a month.  With the amount of time needed to put out the kind of finished product I’m happy with, makes for some long, long hours at the drawing table.

If you could give one piece of advice to an aspiring comics creator, what would that be?

Keep working at it.  Do your craft for the love of it.  You will continuously improve.  The industry is set up in such a way that it is difficult to get hired without having prior experience.  But keep at it and do your own thing if necessary.

You can support Jeremy’s Kickstarter for his new Dino-Day Art Book here.

Filed Under: Pro Tips, ProFile Tagged With: Bad Karma, Batwoman, career, collaboration, Comics conventions, comics industry, Constantine, creativity, Cullen Bunn, DC, Image Comics, improving as an artist, Jeremy Haun, Leading Man, learning, making comics, Marvel, Narcoleptic Sunday, The Beauty, Wolf Moon

Process, pixels and pitfalls – Comics for Beginners podcast episode 27

by Palle Schmidt Leave a Comment


I got an email from a VIP subscriber who had a bunch of questions regarding his process. What program or software do you suggest for paneling or arranging the images with boarders on a computer? How much bigger should I do my drawing than the actual panel size? Is It important that all my drawings be consistent with that rule? Should I draw out panels into the page and start working on that or draw separate images and put them together on the computer?

I try to answer these and other questions in this podcast.

A shot of my desk, as requested by Joe!


Filed Under: Podcast, Pro Tips Tagged With: art hacks, artwork, creativity, drawing, how to, improving as an artist, inking, making comics, painted art, painting, Photoshop, pixelation, pro tips, process, scanning, test page, tips for making comics, workflow

Video: How to Draw a Leather Jacket in Less Than 3 Minutes

by Palle Schmidt Leave a Comment

Here is a little trick to get the job done faster, if you’re trying to draw a leather jacket. It works on other things as well!

There is an Amazon link in the resources section to the acrylic markers shown in this video.

—

Want more tips and trick like these? Make sure to sign up for the newsletter.

free-e-book

Filed Under: Art Tutorial, Pro Tips, Video Tagged With: acrylic markers, art hacks, drawing, highlights, how to, inking, leather jacket, making comics, white on black, white pencil, wrinkles

  • « Go to Previous Page
  • Go to page 1
  • Go to page 2
  • Go to page 3
  • Go to page 4
  • Go to page 5
  • Interim pages omitted …
  • Go to page 12
  • Go to Next Page »

Primary Sidebar

Hours of Premium Content

ComicsCrashCourse

Try the FREE 7-day Comics Course

Creator Profiles

Interviews with Creators

The CFB Podcasts

Find them here.

Comic Creators eBook

The Comic Creators eBook

Footer

Check out more resources

Bundles of quality content available, check how to write comics and how to make your comic book artwork look great or find tips and tricks on the blog.

Latest from the blog

  • Digital Tools for 2021
  • The Most Badass Tools for Inking Comics
  • Why Creative Restrictions are Good for You!
  • How to Write a Great Story – and Stick the Landing
  • Whatever Works
  • Coloring in Photoshop – 5 Steps for the Absolute Beginner
  • Video: Creativity Everywhere

Contact us

If you have questions or issues please contact us.

Official mail: mail(at)comicsforbeginners.com

Feel free to connect on Twitter and/or Facebook.

Copyright © 2021 · ComicsForBeginners by Palle Schmidt Log in