• Skip to main content
  • Skip to secondary navigation
  • Skip to primary sidebar
  • Skip to footer

Comics for Beginners

How to Write & Draw Comics

  • Contact
  • About
  • Faqs
  • Log In
  • Resources
  • Podcasts
  • Comics Crash Course
  • Blog
  • Videos

coloring

Coloring in Photoshop – 5 Steps for the Absolute Beginner

by Palle Schmidt Leave a Comment

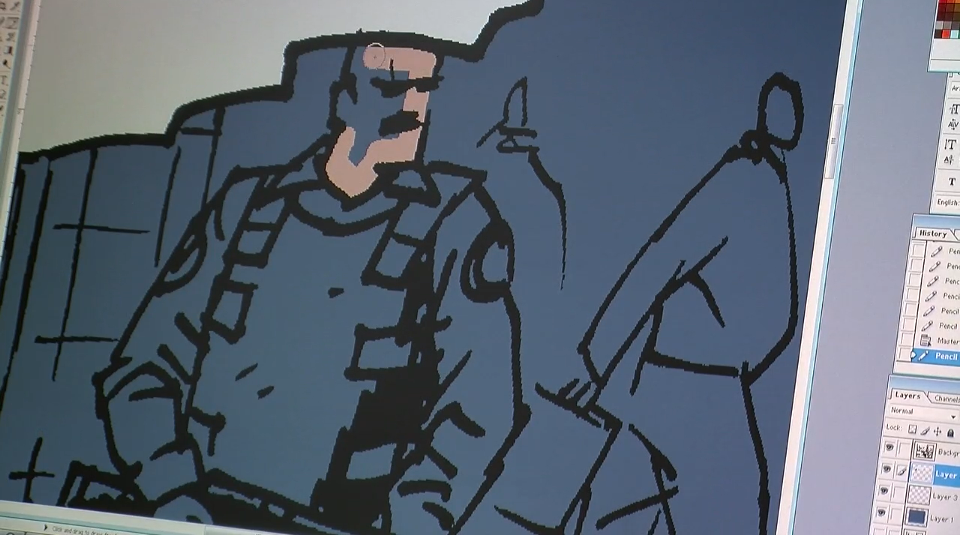
Make sure your line art is in a separate layer from your colors!

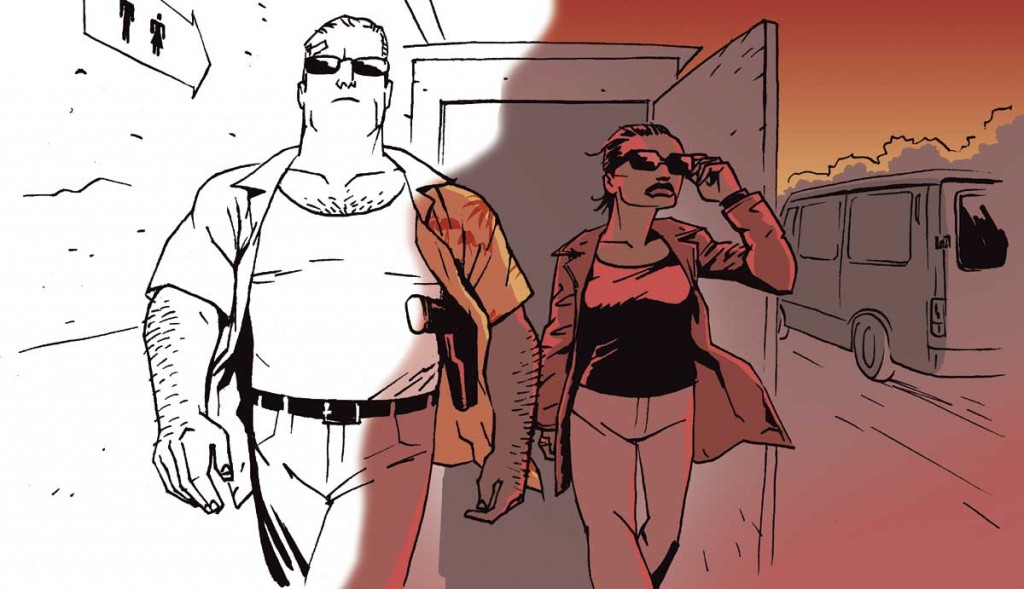
Digital coloring can be just as elaborate and detailed as an oil painting. But if you’re just getting started, here is a simple step-by-step guide for getting ready to color your comics in Photoshop.


Step # 1: Scan your line art.

I would recommend scanning in Grayscale and converting to Bitmap after. The resolution should be at least 300 dpi (dots per inch), maybe even 600 dpi. I would also recommend converting your line art to bitmap before you start working on it, to make sure the lines are crisp and clean.

Step # 2: Grayscale to RGB

I know I just told you to convert your line art to Bitmap – But in order to start coloring, you need to convert it back to grayscale, before you can convert it to RGB.

Step # 3: Copy your background layer

Making a copy of your line art layer is a good precaution, in case you screw something up. Click the visibilty of the original layer off and set the layer mode of the copy to “multiply”. This basically transforms your line art layer to the equivalent of clear plastic film that you put on top of your color layer.

Step # 4: Color layer(s)

Make a new layer in “Normal” mode, and make sure to place it under your line art layer.

Step # 5: Start coloring!

That’s it! No more steps really, unless you want to get creative – which you should! But this post is meant to just get you started, so these 5 steps are all you need to know for now, except this:

Bonus step: Save, flatten, save again.

When you have finished coloring your page (and along the way, just to be sure) save your work as a Photoshop file, so you have a back up including all the layers.

Then go to the “layers” menu and click “flatten image”.

If you intend for your comic to be printed, convert the color mode to CMYK and save it as a Tiff file. If it’s for web use or an inkjet printer, keep it in RGB and save it as a Jpeg.

Related post: Tips for Digital Coloring
Filed Under: News Tagged With: artwork, bitmap, cmyk, coloring, digital painting, how to, layers, Photoshop, rgb, tiff, tips for making comics, workflow

Art tutorial: Tips for digitally coloring comics

by Palle Schmidt Leave a Comment

coloring-in-psd

Coloring digitally in Photoshop or Manga Studio can save you some time and grief, and it is pretty easy to learn. Here are a few pro tips to make it even easier!

  • Start with the background color and the general flow of the page and save the best for last: coloring your characters.
  • Make a seperate layer for your characters and foreground objects, and flat them out first. This saves you time when coloring, because you can select the entire shape and not be afraid to paint outside the lines.
  • If you are coloring for print, please note that your screen is backlit, which means it looks a lot brighter there than it will on paper! Beware of colors that are too dark.
  • Convert the image to grayscale, to see if the color works. I know this sounds weird, but thinking of coloring in shades of grey can really help. It’s all about light and dark, and everything in between. By converting to grayscale, you will instantly spot where if it is all the same value, too dark or too muddled. You can always undo the conversion and get all your colors back!
  • Always put your line art on top, so you paint under the line art. Set the line art layer mode to multiply, that should work perfectly.
  • Colors should not compete with line art. Try not to have colors that are too dark. 80% black is probably too close to the black of the line art.
  • Use a seperate layer for the background color and another on top for people and objects etc. Experiment with the opacity of your regular color layer, to let the background color shine through.
  • Having a seperate layer for speech balloons and borders placed at the top of your color layers is also a good idea, as it prevents the risk of painting over your borders or into the whites of the balloons.

Related video:
Episode 8: Coloring in Photoshop

Filed Under: Pro Tips Tagged With: Art Tutorial, coloring, digital, digital painting, how to, making comics, painting, Photoshop, tips for making comics

ProFile: Gabriel Bautista

by Palle Schmidt Leave a Comment

ProFile-Gabriel-Bautista

GABO is an illustrator based out of Chicago. He’s worked for DC Comics, Image Comics, Oni Press and Thrillbent. He is an Eisner and Harvey Award winning colorist. http://yogabogabo.com

What made you decide to work in the medium of comics?

Speed. I’ve always loved telling stories, building new worlds with only a pencil, paper and the thoughts in my head. I had always imagined myself working in animation, creating cartoons to tell the stories I wanted to share, but as I got older I started to realize that animation, even though it’s an amazing medium, it was just way too time consuming. The idea that I could sit in a cramped corner of my little room and just draw an entire story in just a few days on paper was sheer brilliance to me, and then being able to share this new world with others by making photocopies of each, well I was sold.

What part of the process is the most challenging or frustrating to you?

FRUSTRATION = FLATTING. GOD I HATE FLATTING. (Flatting for those who don’t know is the first step in coloring where you lay down the basic colors on the page before adding shadows, tones, lighting, effects etc.) It is so time consuming, and well you know how much I love speed – I just need this thing to be done so I can present it to the world! So when I can, I find someone to do that for me.

The most challenging part of comics I feel is layouts. Figuring out how to put down on paper what the writer wants to see, and doing it in fresh and innovative ways. Layouts are the foundation of any comic. There have been times when I don’t draw them out first, but they still exist in my mind, you can’t get away from it!

If you could give one piece of advice to an aspiring comics creator, what would that be?

You can’t be a comic book artist if you don’t make comics. And you WILL NOT GET BETTER if you don’t do them. Learn to live with your work, the things you draw in 5-10 years will look so much better than most of the work you do now, so just have fun! LET GO OF PERFECTION. JUST DO.

Filed Under: Pro Tips, ProFile Tagged With: animation, career, coloring, creativity, DC comics, drawing, Eisner awards, Elephantmen, flatting, Gabo, Gabriel Bautista, Harvey Awards, illustartion, Image Comics, improving as an artist, layouts, Oni Press, storytelling, Thrillbent, tips for making comics, workflow

Primary Sidebar

Hours of Premium Content

ComicsCrashCourse

Try the FREE 7-day Comics Course

Creator Profiles

Interviews with Creators

The CFB Podcasts

Find them here.

Comic Creators eBook

The Comic Creators eBook

Footer

Check out more resources

Bundles of quality content available, check how to write comics and how to make your comic book artwork look great or find tips and tricks on the blog.

Latest from the blog

  • Video: How to get Story Ideas
  • Video: The Benefit of Being a Nobody
  • Video: Why Creatives Hear Voices
  • Digital Tools for 2021
  • The Most Badass Tools for Inking Comics
  • Why Creative Restrictions are Good for You!
  • How to Write a Great Story – and Stick the Landing

Contact us

If you have questions or issues please contact us.

Official mail: mail(at)comicsforbeginners.com

Feel free to connect on Twitter and/or Facebook.

Copyright © 2023 ยท ComicsForBeginners by Palle Schmidt Log in