• Skip to main content
  • Skip to secondary navigation
  • Skip to primary sidebar
  • Skip to footer

Comics for Beginners

How to Write & Draw Comics

  • Contact
  • About
  • Faqs
  • Log In
  • Resources
  • Podcasts
  • Comics Crash Course
  • Blog
  • Videos

inking

Step-by-Step Guide: My Comics Process

by Palle Schmidt 6 Comments

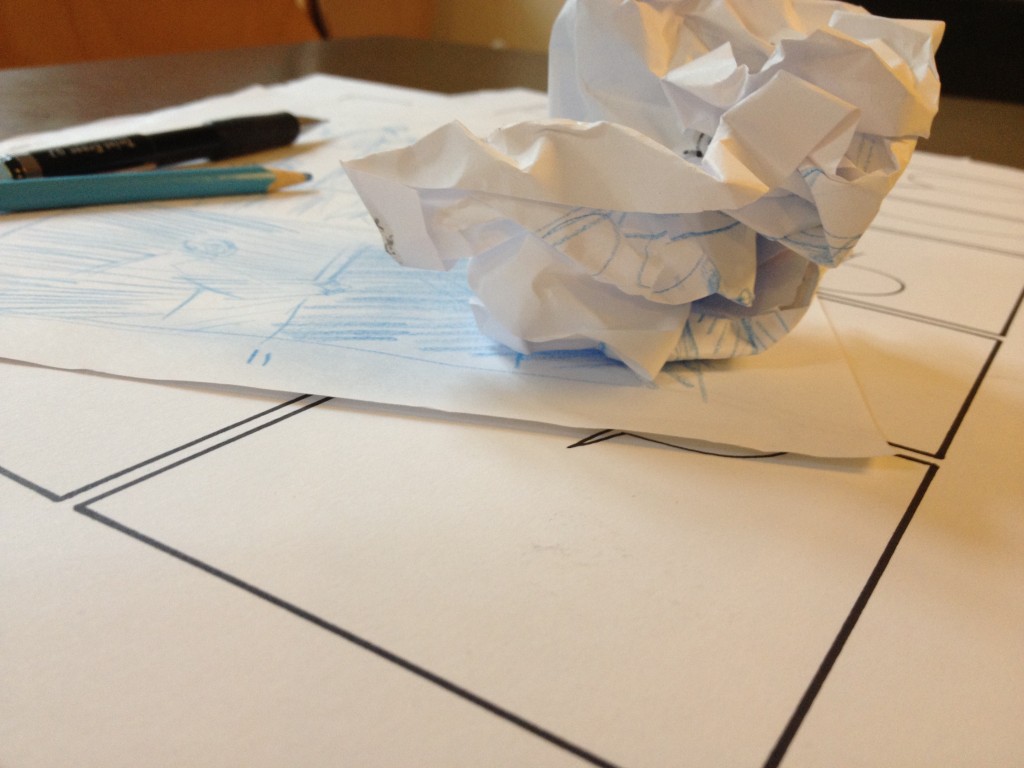
This is my next graphic novel project! Filling in the blanks should be no biggie, right? Well, there’s a little more to it than that.

I recently posted this picture on Instagram and Facebook that got a lot of likes – and a lot of questions! So I thought I’d elaborate a bit on how I actually tackle the creation of a comic or graphic novel. I go into detail with certain elements in my premium 10-video tutorial series, but these are the basic steps I go through every time.

1: Script

Having a finished script before you start drawing increases your chance of actually finishing with about 3000 percent. The first 2 videos of the premium series covers this (and those episodes are free). Sometimes I’ll get a script from another writer but I often work off my own or have to break the story down into pages.

2: Thumbnails

This is little scribbles just to get a grip of the page breakdowns. I don’t neccesarily do it for every page but it can be very helpful. The more I plan before I start drawing, the more smoothly the rest of the process. There is a podcast episode about making those hard choices here.
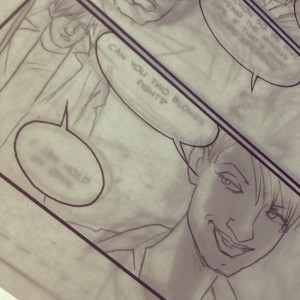
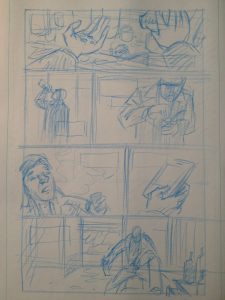
3: Rough sketches

Once I know sort of what the layout of the page will look like, I can start rough sketching pictures. As you’ll notice, this is bare bones storytelling, just enough for others to make out what is going on. No more, no less. I usually sketch on half pages, not full size. No need for bigger format when I’m not doing details – in fact the smaller format often helps in creating a clear layout.

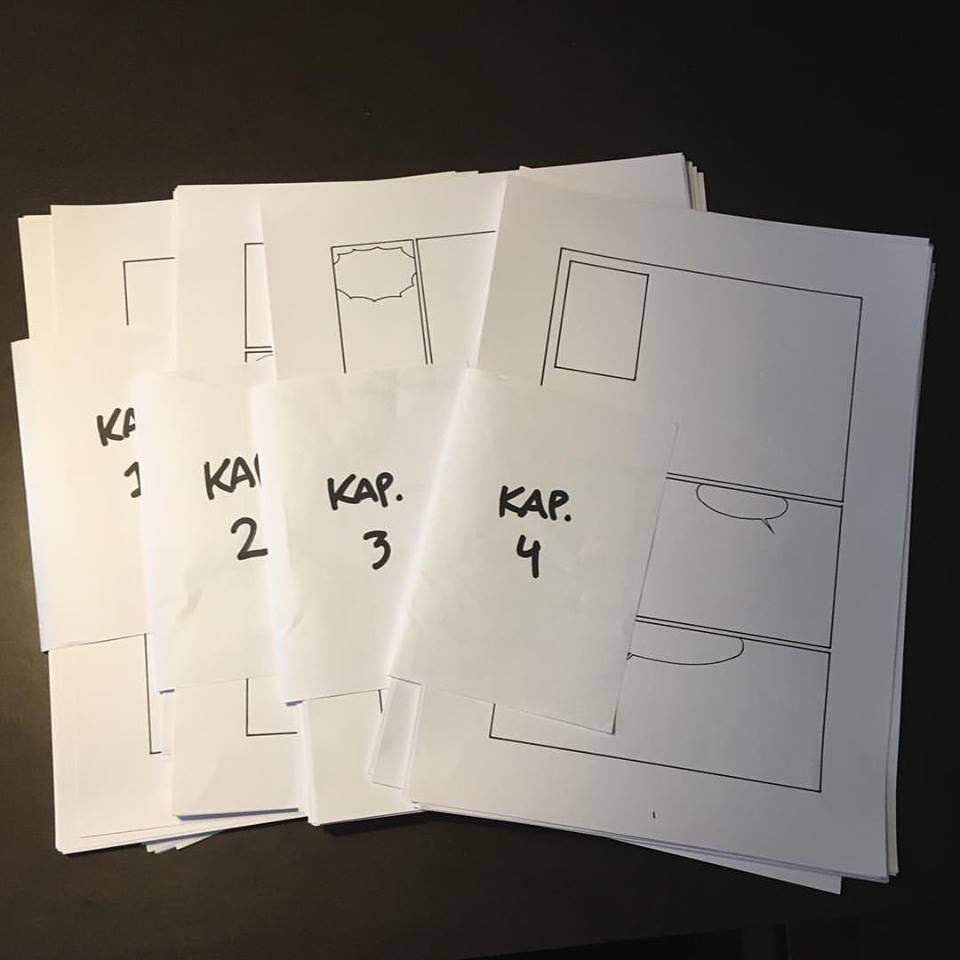
4: Borders and lettering

After scanning my rough sketches, I put them in an InDesign document. If it’s an issue of a comic, I’ll make seperate 22-page files that stick to the same template. I’ll start by creating a standard border for the entire project and just plunk that in between all the frames. Then I’ll put the lettering in where it needs to go. Please note, that this is not the final document! I can adjust the lettering once I have the finished art. For full breakdown of this process go here.

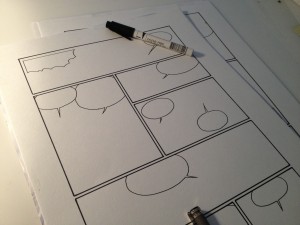
5: Borders and balloons

Using a print-out of my now lettered rough sketches, I am ready to draw the actual pages. BUT, since I might need my borders and speech balloons in a clean format, I do the boring work of inking that part first. This is what the image I posted on Instagram portrayed – I can see why there was some confusion as to how I actually worked!

After I’ve traced the borders and balloons on the board I intend to do the rest of the artwork on, I scan the whole thing. Why? I’ll explain in step #8.

6: Sketching

Using my rough sketches as a guide, I’ll sketch the pages going into more detail, especially on backgrounds and stuff. A picture might change from my original ideas, but I always stick within the frames I already decided on. There’s a video of that process here.
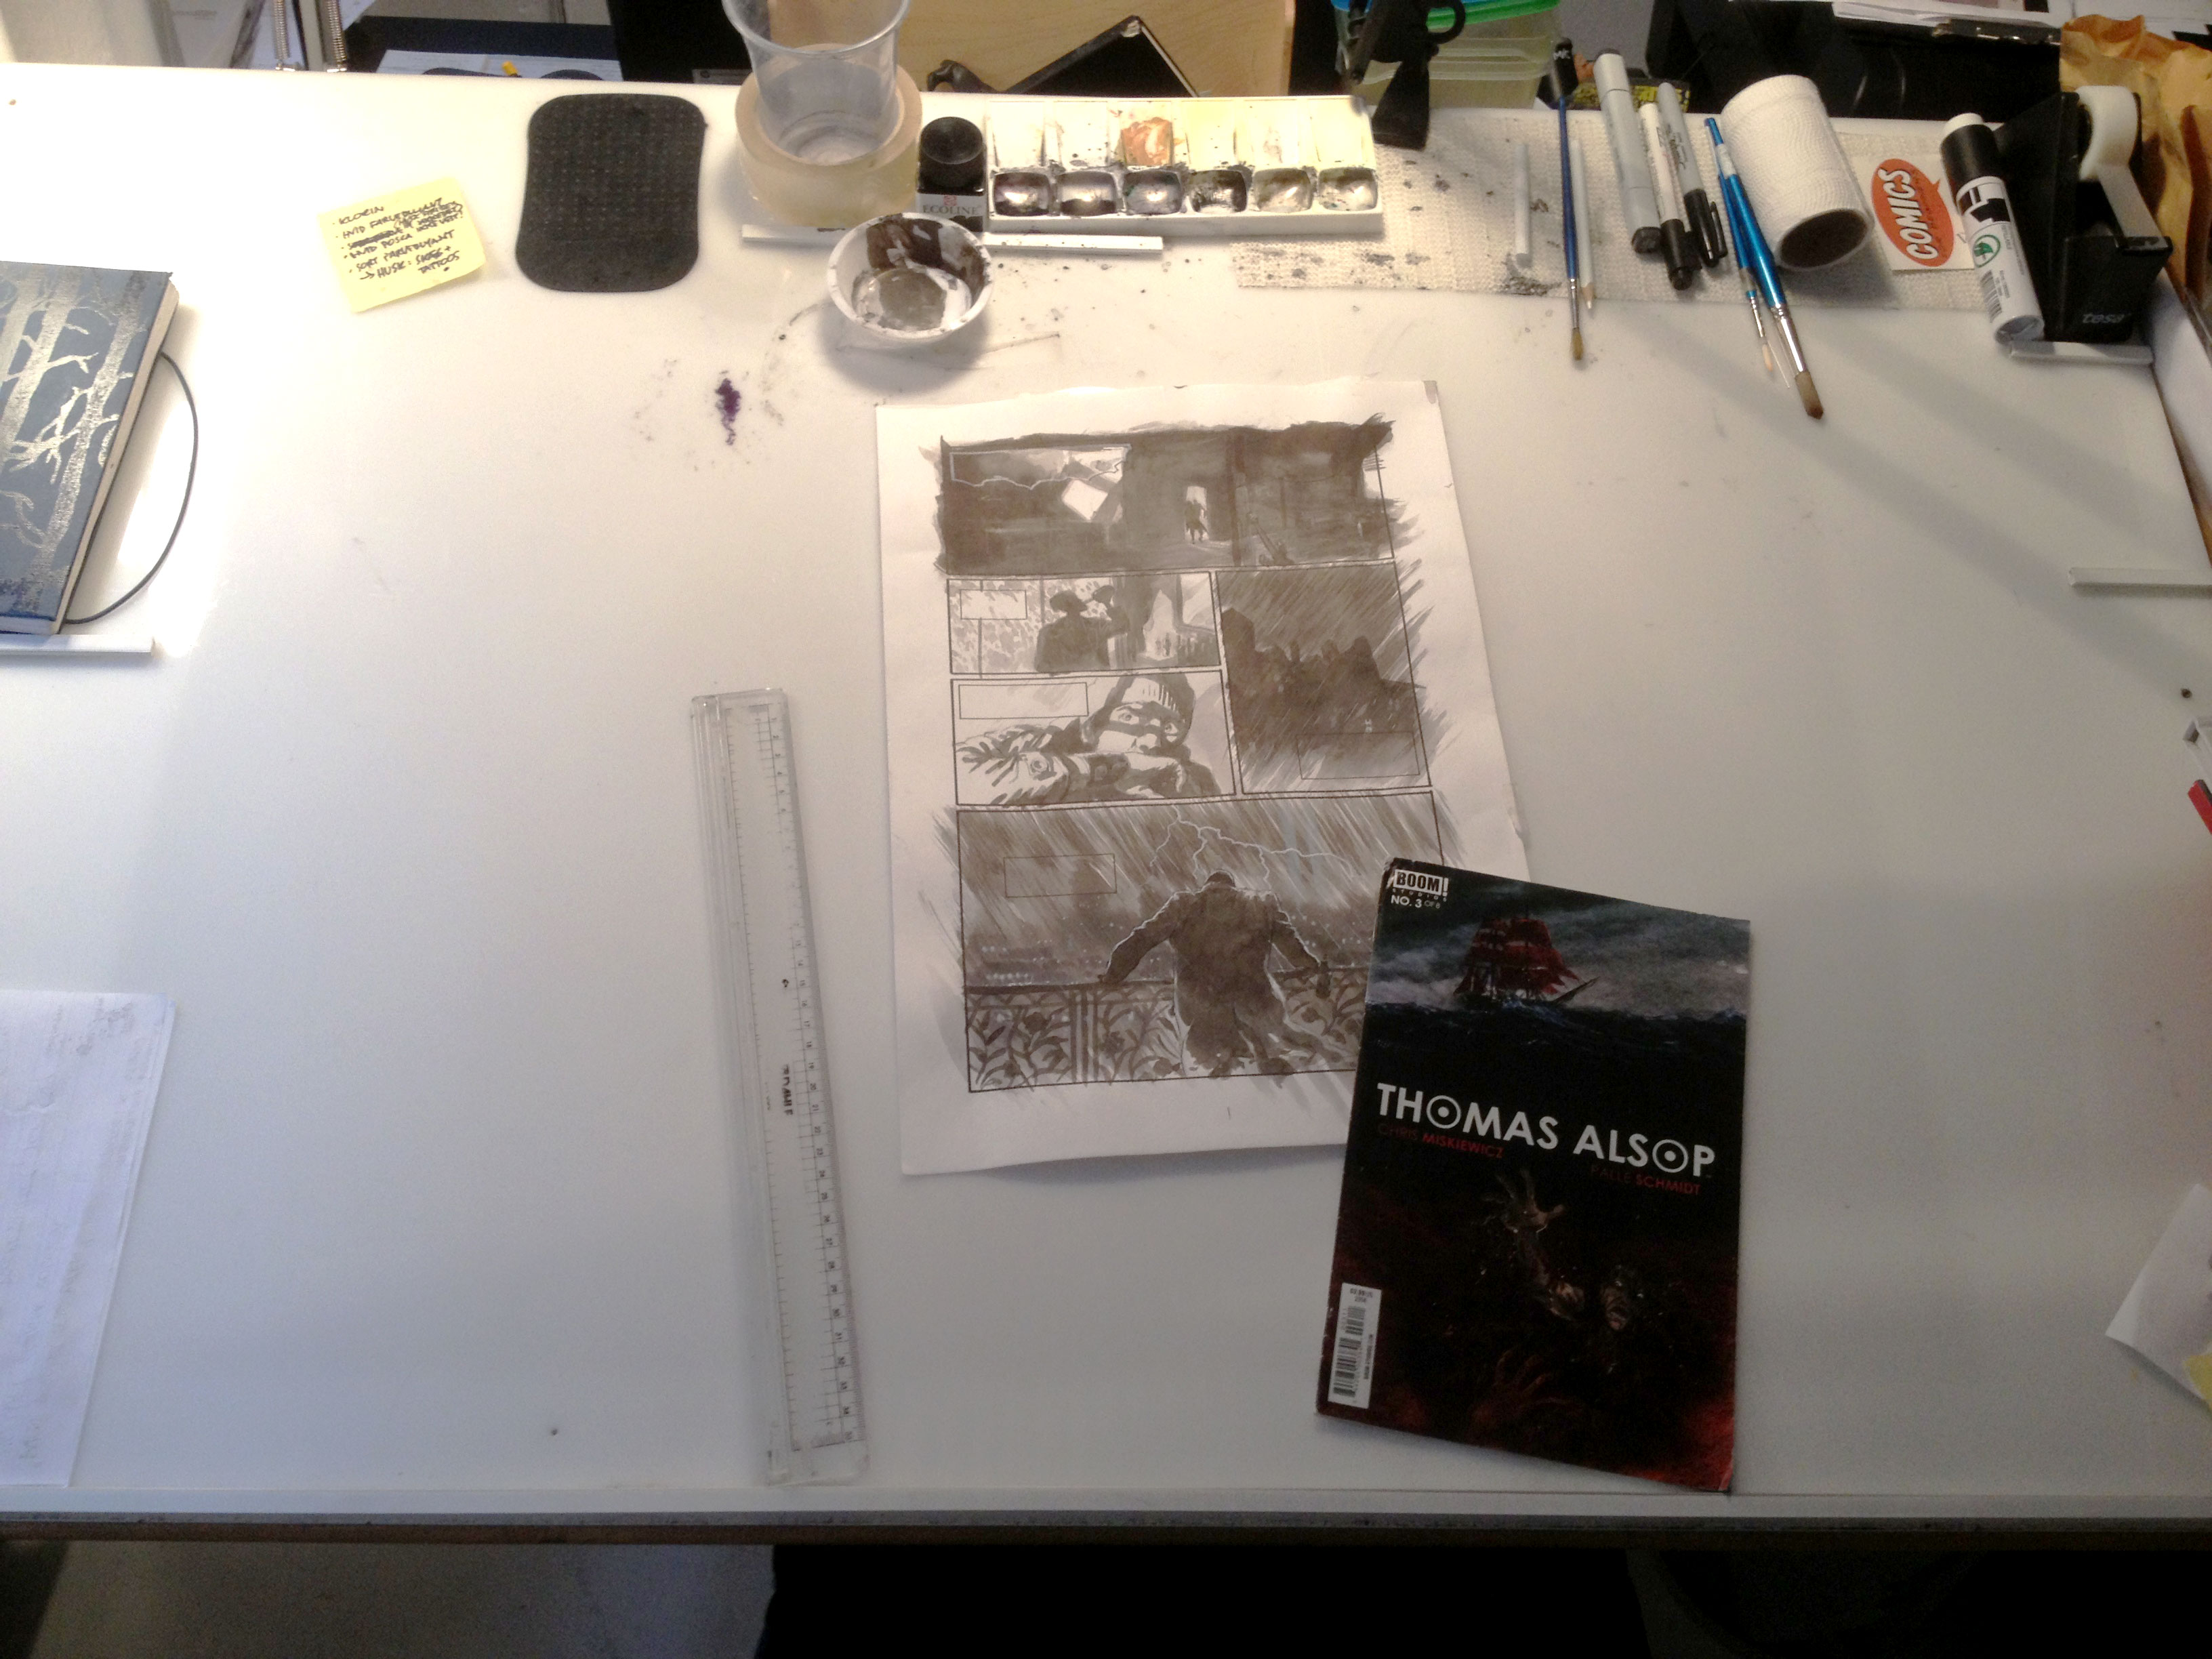
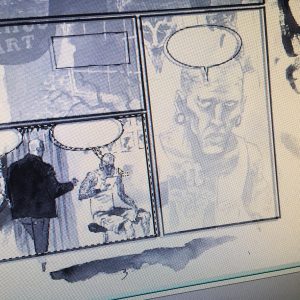
7: Inking

Using a lightbox I trace my skectched pages on the boards that already has the borders and balloons. I can adjust the images a bit if needed. Sometimes I do painted art and other times I ink with black markers. There’s a video of me inking a page of Thomas Alsop here.

I don’t need to worry about paiting outside the borders in this stage because I’ve already scanned the clean pages with just balloons and borders, and no art.

8: Scanning and clean-up.

Remember when I said I might need the borders clean? This is the step. I used to I scan my inked pages and clean up mistakes where I painted outside the frames or over speech balloons. Now I just use the already scanned borders. I just smack my clean borders over the finished art in Photoshop, turn the opacity down a bit so I can see what I’m doing and adjust the corners. It took me a while to figure this out, because sometimes a scanner will skew things a little bit. But I discovered that if I do a “free transform” and focus on the four outer corners of the borders, the rest will sort itself out.

Once the two layers match up, I’ll select all the white within the frames on the top layer and delete that. Then I turn the opacity of the layer back up to 100% and viola! I now have a layer with nice, clean borders and balloons on top, and whatever mistakes (painting outside the borders) I made are hidden underneath. I flatten the file and export it, usually as a high-res tiff file.

8.1: Coloring (optional)

I’m not gonna go into detail here, but you might want to check out this post on coloring in Photoshop.

9: Repeal and replace!

Admitted, I don’t really call it that. But I do have to go through my already lettered InDesign file and delete all the border blocks and replace my rough sketch with the finished art. Some adjusting to the lettering is usually neccesary but then I have the entire book or issue ready to send to the graphic designer or export as a PDF directly for print.

10: Celebrate

I usually skip this step, honestly. But having typed up this post and seeing how much work goes into creating a graphic novel, I feel like I should make a point of this going forward.

Hopefully this answered some of your questions and gave you a few ideas to implement in your own process. Please share this post if you found it helpful!


Filed Under: Pro Tips Tagged With: A. J. Kazinski, art hacks, Art Tutorial, balloons, borders, comics, creativity, graphic novel, how to, inking, making comics, mistakes, painting, Photoshop, planning, pro tips, process, sketching, speech balloons, storytelling, Thomas Alsop, tips for making comics, workflow

Choose The Right Inking Style

by Palle Schmidt 2 Comments


Some say there are only seven different stories in the world. That may be true. But there are a million different ways to tell your story!

In comics, probably the most important part of the storytelling, is the style you choose in the drawing. A lot of black on the page tends to attract an older audience, while a slick, curved line art and big eyes on the characters will give off a more Manga-like feel. There is a huge difference between a character sketched rendered in scratchy-scratchy detail like a Burns or a Crumb and a drawing inked in flat blacks like a Mignola or a Miller.

First off you have to decide what the genre of the story is. Maybe your style itself fits a certain genre, maybe you are able to change up your style to fit the genre. Whatever the case,you need to make a conscious decision.

My advice would be to look at other comics in the genre and see how they do it. The danger is that you may get too influenced by a certain style or artist, so having more than one reference is always a good idea!

Most artist have what I would call “riffs”. A certain way of drawing something, usually a short cut of sorts. You pick up riffs along the way, but you also invent your own. Your hand will do most of the hard work, but you can also conciously decide to use a certain inking style on a project.

The most important thing about style and tone, is consistency. A set of dogma rules for yourself before you start drawing a particular story can be a good idea. Choose the tools and riffs you will use and stick to that. Do short stories and try out different techniques, see what works for you. And what it does for the story! You can do it in a million different ways – the key to succesful storytelling is to pick a way and stick to your decision.

Filed Under: Pro Tips Tagged With: drawing, inking, inking style, making comics, productivity, style

Process, pixels and pitfalls – Comics for Beginners podcast episode 27

by Palle Schmidt Leave a Comment


I got an email from a VIP subscriber who had a bunch of questions regarding his process. What program or software do you suggest for paneling or arranging the images with boarders on a computer? How much bigger should I do my drawing than the actual panel size? Is It important that all my drawings be consistent with that rule? Should I draw out panels into the page and start working on that or draw separate images and put them together on the computer?

I try to answer these and other questions in this podcast.

A shot of my desk, as requested by Joe!


Filed Under: Podcast, Pro Tips Tagged With: art hacks, artwork, creativity, drawing, how to, improving as an artist, inking, making comics, painted art, painting, Photoshop, pixelation, pro tips, process, scanning, test page, tips for making comics, workflow

Video: Lessons from Thomas Alsop

by Palle Schmidt 7 Comments

I’ve just finished my work on the monthly book from BOOM!, Thomas Alsop. This video is about some of the lessons I learned working on that book – hopefully there is some value in it for you too!

Filed Under: Pro Tips, Video Tagged With: art hacks, Art Tutorial, bonus video, BOOM! Studios, career, Chris Miskiewicz, collaboration, creativity, drawing, improving as an artist, inking, learning, lessons, mind hacks, mistakes, painting, process, productivity, reference, Thomas Alsop, tips for making comics, video, watercolor, workflow

Video: How to Draw a Leather Jacket in Less Than 3 Minutes

by Palle Schmidt Leave a Comment

Here is a little trick to get the job done faster, if you’re trying to draw a leather jacket. It works on other things as well!

There is an Amazon link in the resources section to the acrylic markers shown in this video.

—

Want more tips and trick like these? Make sure to sign up for the newsletter.

free-e-book

Filed Under: Pro Tips, Video Tagged With: acrylic markers, art hacks, Art Tutorial, drawing, highlights, how to, inking, leather jacket, making comics, white on black, white pencil, wrinkles

Bonus Vid – How To Hold a Pencil

by Palle Schmidt 12 Comments

Is there a right way to hold a pen or a pencil when you draw?

One of my YouTube chanel followers seems to think so. And it’s NOT how I hold a pencil!

Sign up for my FREE  7-day Comics Crash Course

Filed Under: Pro Tips, Video Tagged With: career, creativity, criticism, drawing, how to, inking, making comics, mistakes, pencil, pro tips

  • Go to page 1
  • Go to page 2
  • Go to Next Page »

Primary Sidebar

Hours of Premium Content

ComicsCrashCourse

Try the FREE 7-day Comics Course

Creator Profiles

Interviews with Creators

The CFB Podcasts

Find them here.

Comic Creators eBook

The Comic Creators eBook

Footer

Check out more resources

Bundles of quality content available, check how to write comics and how to make your comic book artwork look great or find tips and tricks on the blog.

Latest from the blog

  • Video: How to get Story Ideas
  • Video: The Benefit of Being a Nobody
  • Video: Why Creatives Hear Voices
  • Digital Tools for 2021
  • The Most Badass Tools for Inking Comics
  • Why Creative Restrictions are Good for You!
  • How to Write a Great Story – and Stick the Landing

Contact us

If you have questions or issues please contact us.

Official mail: mail(at)comicsforbeginners.com

Feel free to connect on Twitter and/or Facebook.

Copyright © 2023 · ComicsForBeginners by Palle Schmidt Log in